Mobile clinic scan microsite
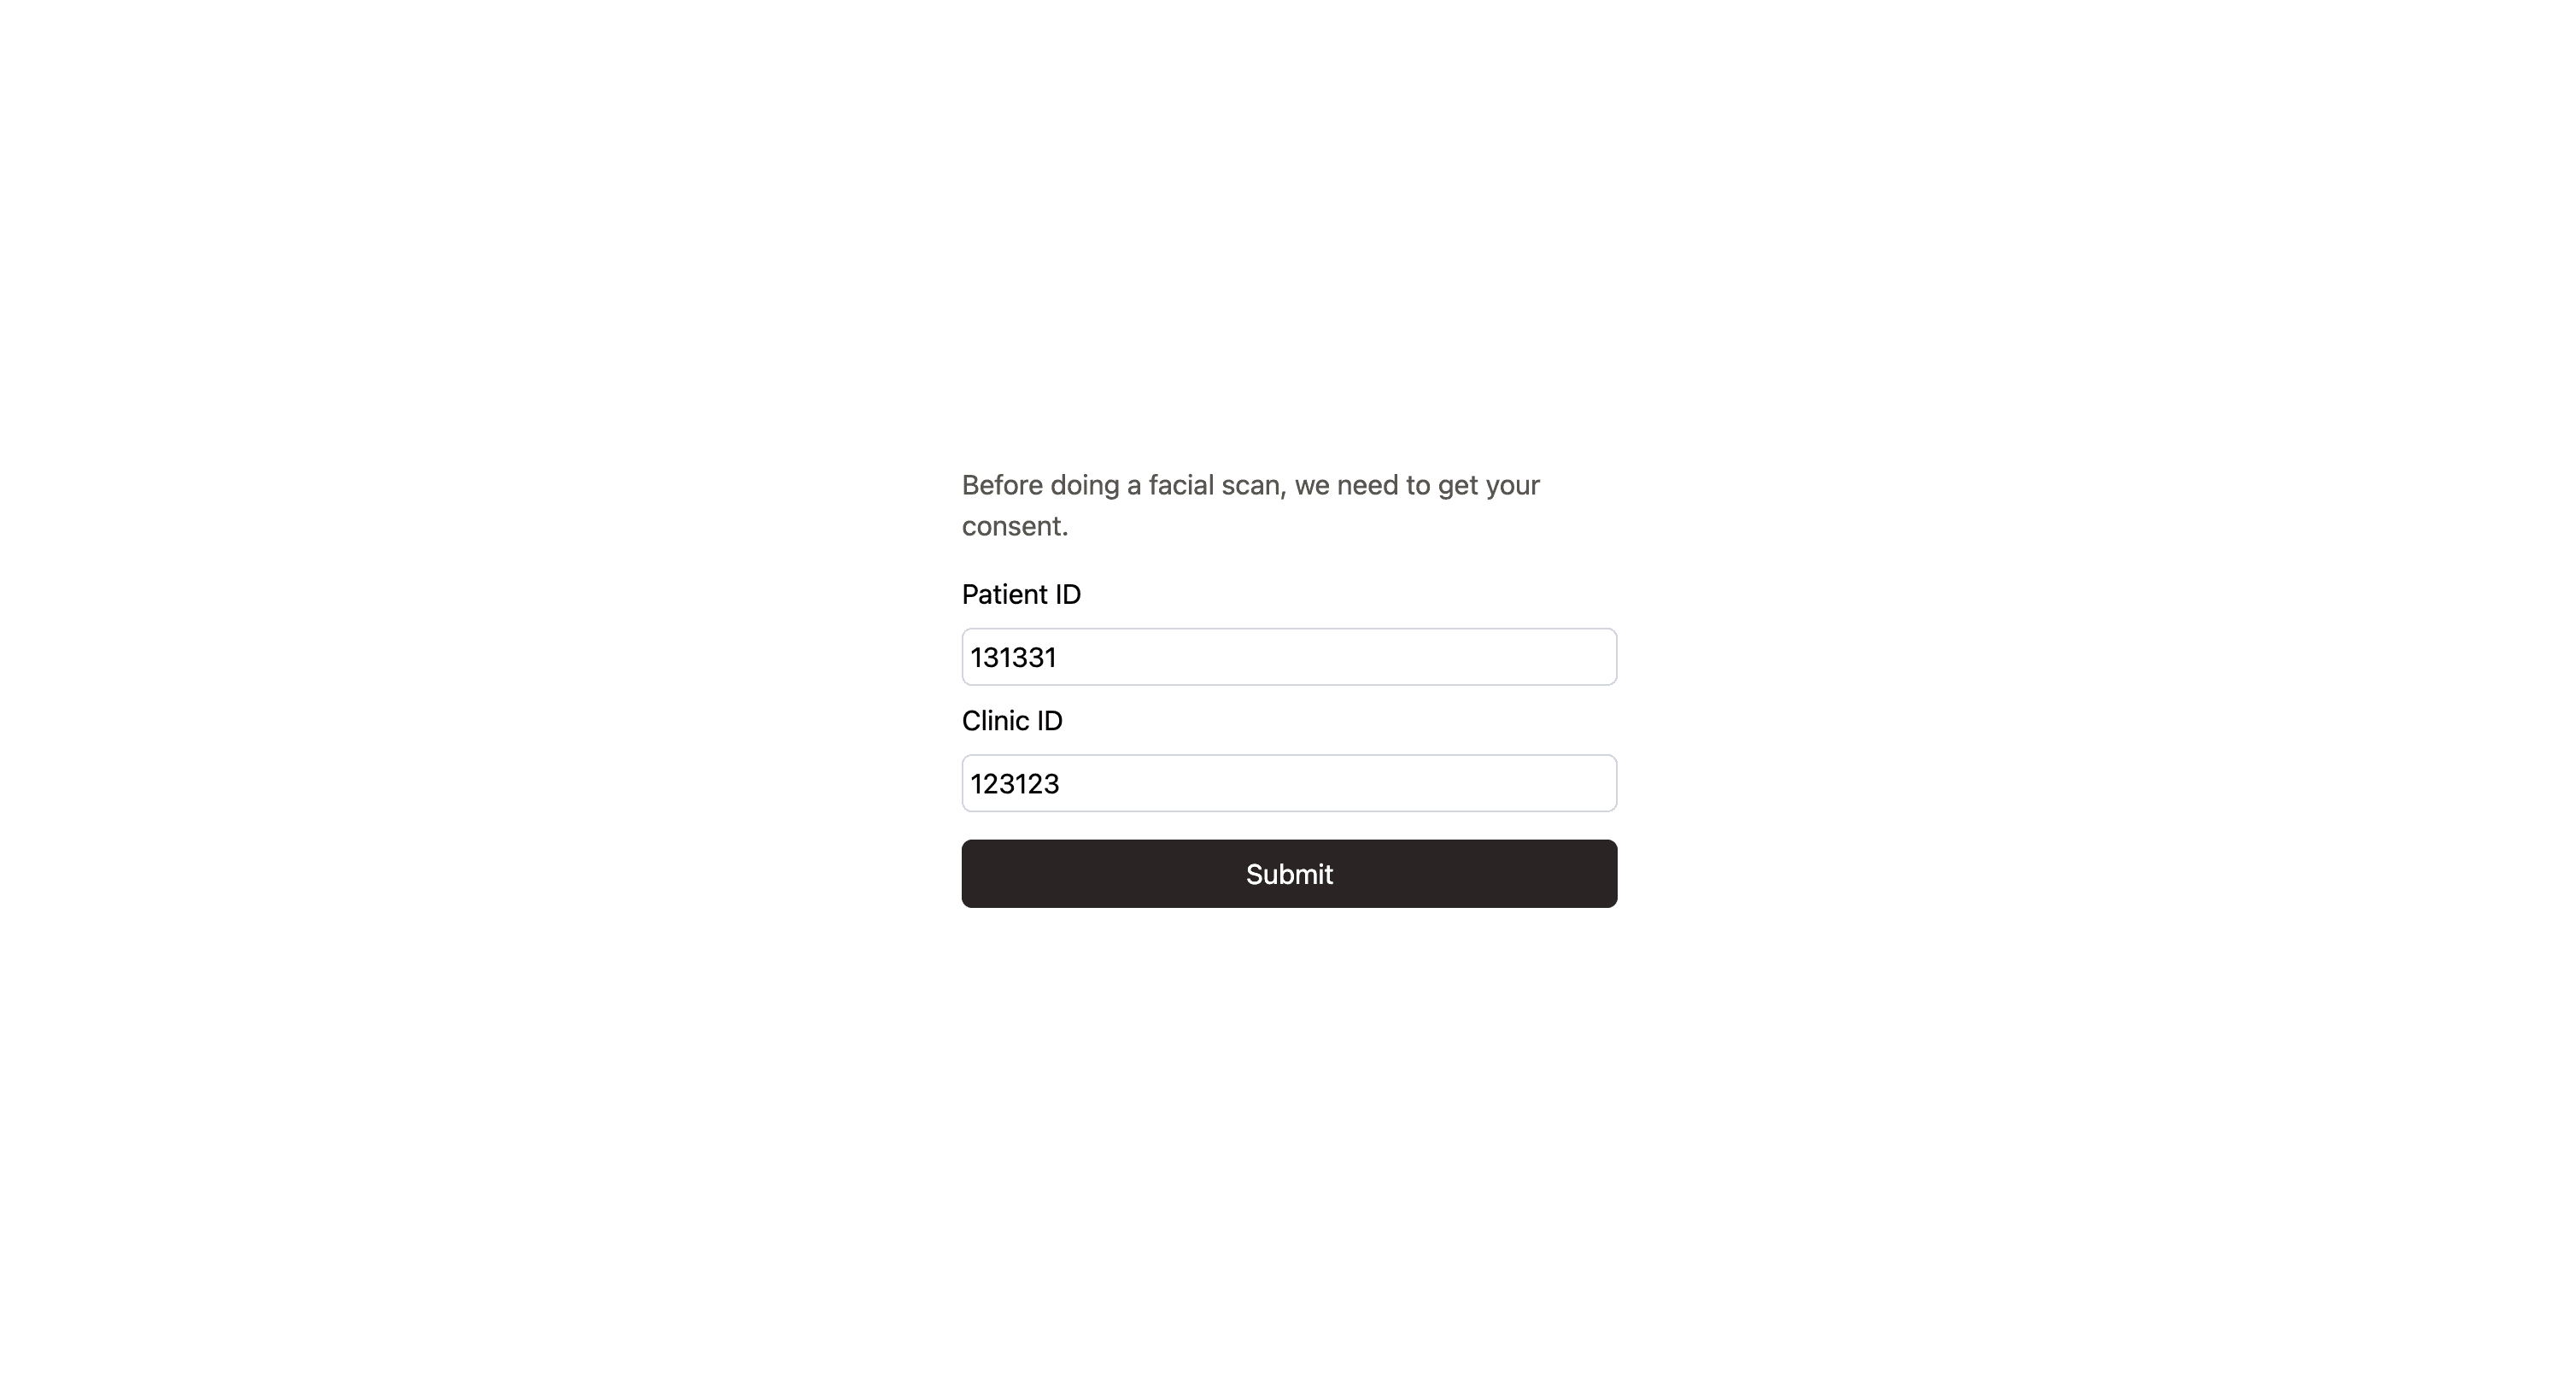
This tutorial follows a mobile clinic — a team that runs pop-up health checks at workplaces and community sites. They want patients to complete a facial scan on a clinic tablet, served from the clinic’s own microsite, with every scan filed under the patient it belongs to.
What makes this work without the clinic standing up any infrastructure of its own:
- The scan flow is a hosted page — you embed it in an
<iframe>on your microsite instead of building scan UI. - The facial scan storage bucket is your database. Every loop that provisions a scan automatically records each session — metadata, intake answers, results — and you browse it from the loop’s Storage tab. Tag each scan with a
patientIdand the bucket becomes your patient scan history. No separate database to run, back up, or secure.
By the end you’ll have a loop deployed, a microsite that triggers it and embeds the scan, and a storage bucket filling up with patient scans.
What you’ll build
patient checks in
  → microsite shows the clinic's own consent screen
  → patient accepts consent
  → microsite backend triggers the loop   (API token)
  → loop provisions a scan, returns scanUrl
  → microsite embeds scanUrl in an iframe  (intake form → scan)
  → patient completes the scan
  → loop's waitForScan resolves
  → scan recorded in the facial scan storage bucket, keyed by patientId
Consent is handled by the clinic, not the hosted scan flow. The microsite shows its own consent screen — branded, worded for the clinic’s jurisdiction — and only triggers the loop once the patient accepts. The microsite owns the check-in and consent screens and the iframe. The loop owns the scan lifecycle. The storage bucket owns the history.
1. Build the scan loop
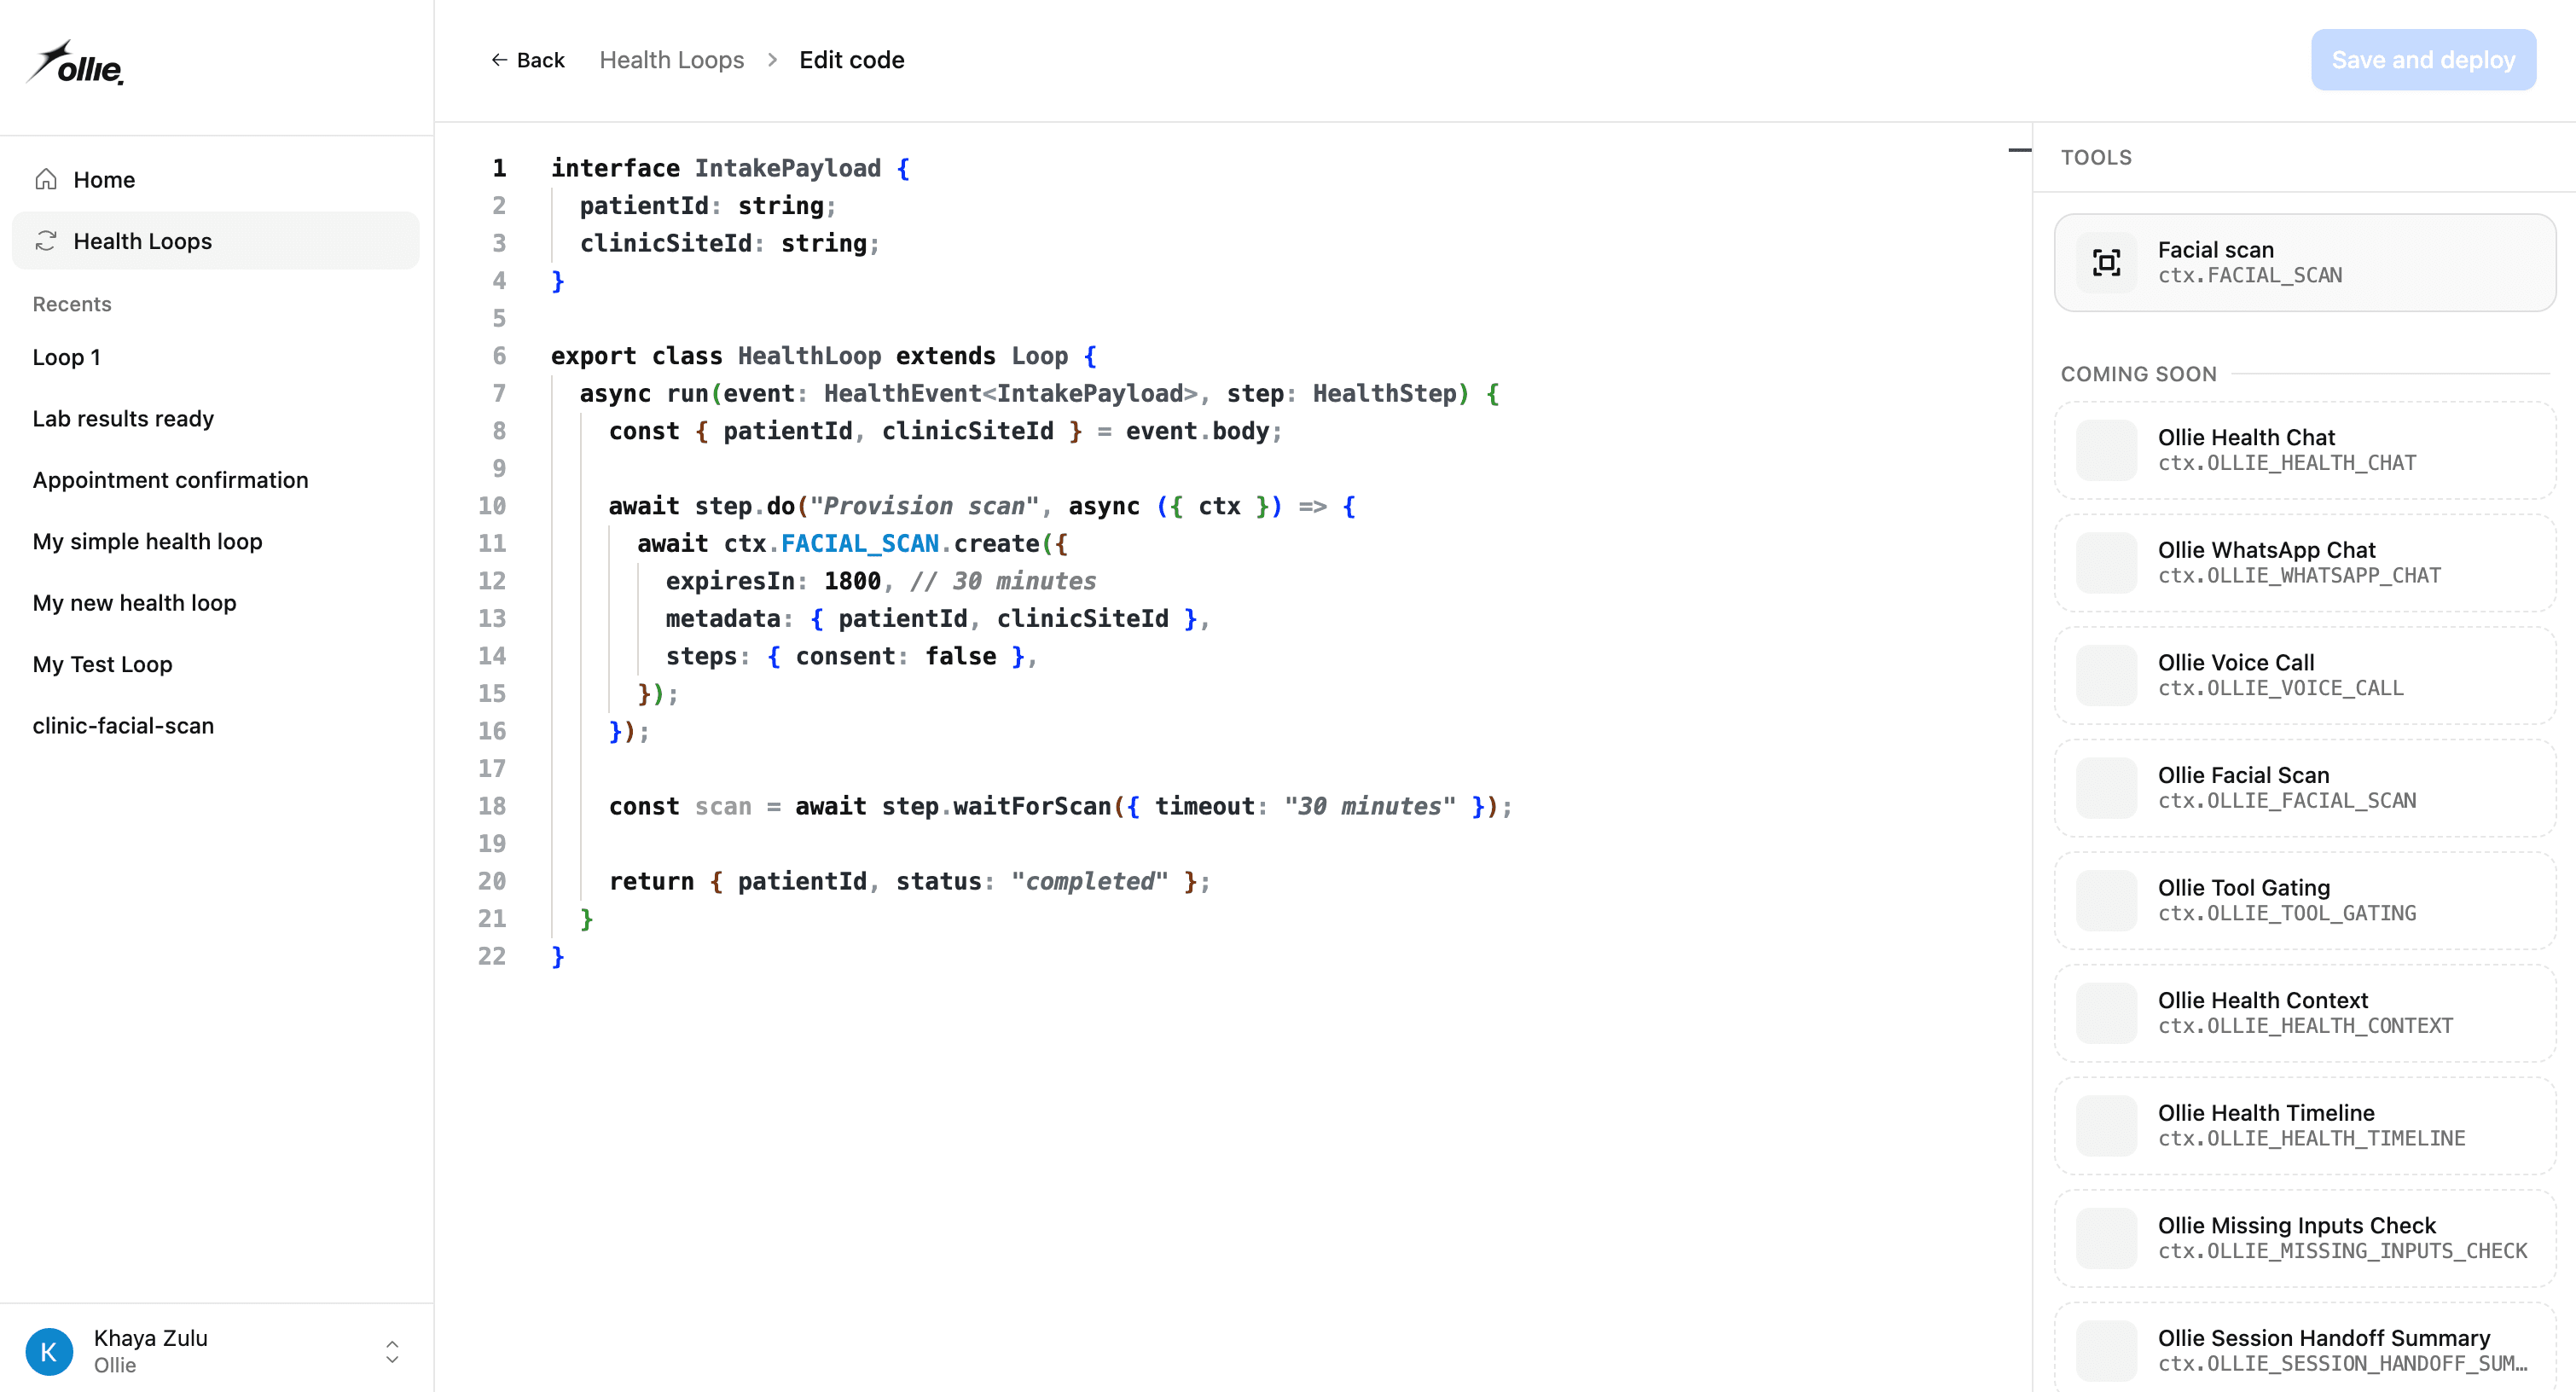
From your loops list, click New Health Loop and name it something like clinic-facial-scan. The loop does three things: read the patient details off the trigger, provision a scan, and wait for it to finish.
interface IntakePayload {
  patientId: string;
  clinicSiteId: string;
}

export class HealthLoop extends Workflow {
  async run(event: HealthEvent<IntakePayload>, step: HealthStep) {
    const { patientId, clinicSiteId } = event.body;

    await step.do("Provision scan", async ({ ctx }) => {
      await ctx.FACIAL_SCAN.create({
        expiresIn: 1800, // 30 minutes
        metadata: { patientId, clinicSiteId },
        steps: { consent: false },
      });
    });

    const scan = await step.waitForScan({ timeout: "30 minutes" });

    return { patientId, status: "completed", scanId: scan.id };
  }
}
Three things are doing the work:
metadata: { patientId, clinicSiteId }is what turns the storage bucket into a patient database. Whatever you pass here is stored on the scan session and echoed back with the results — so every recorded scan already knows which patient and which clinic site it belongs to. You’ll never have to join it back later.steps: { consent: false }drops the consent notice from the hosted scan flow — this clinic shows its own consent screen on the microsite and only triggers the loop after the patient accepts, so the hosted flow shouldn’t ask again. The intake form stays on, so the patient still answers the quick demographics questions before the scan. See Facial scan → Configuring steps for the full list of stages and intake fields.step.waitForScansuspends the run until the patient finishes (or 30 minutes pass). While suspended the loop isn’t consuming compute.
Click Deploy. You’ll land on the loop’s overview page.
2. Mint a scoped API token
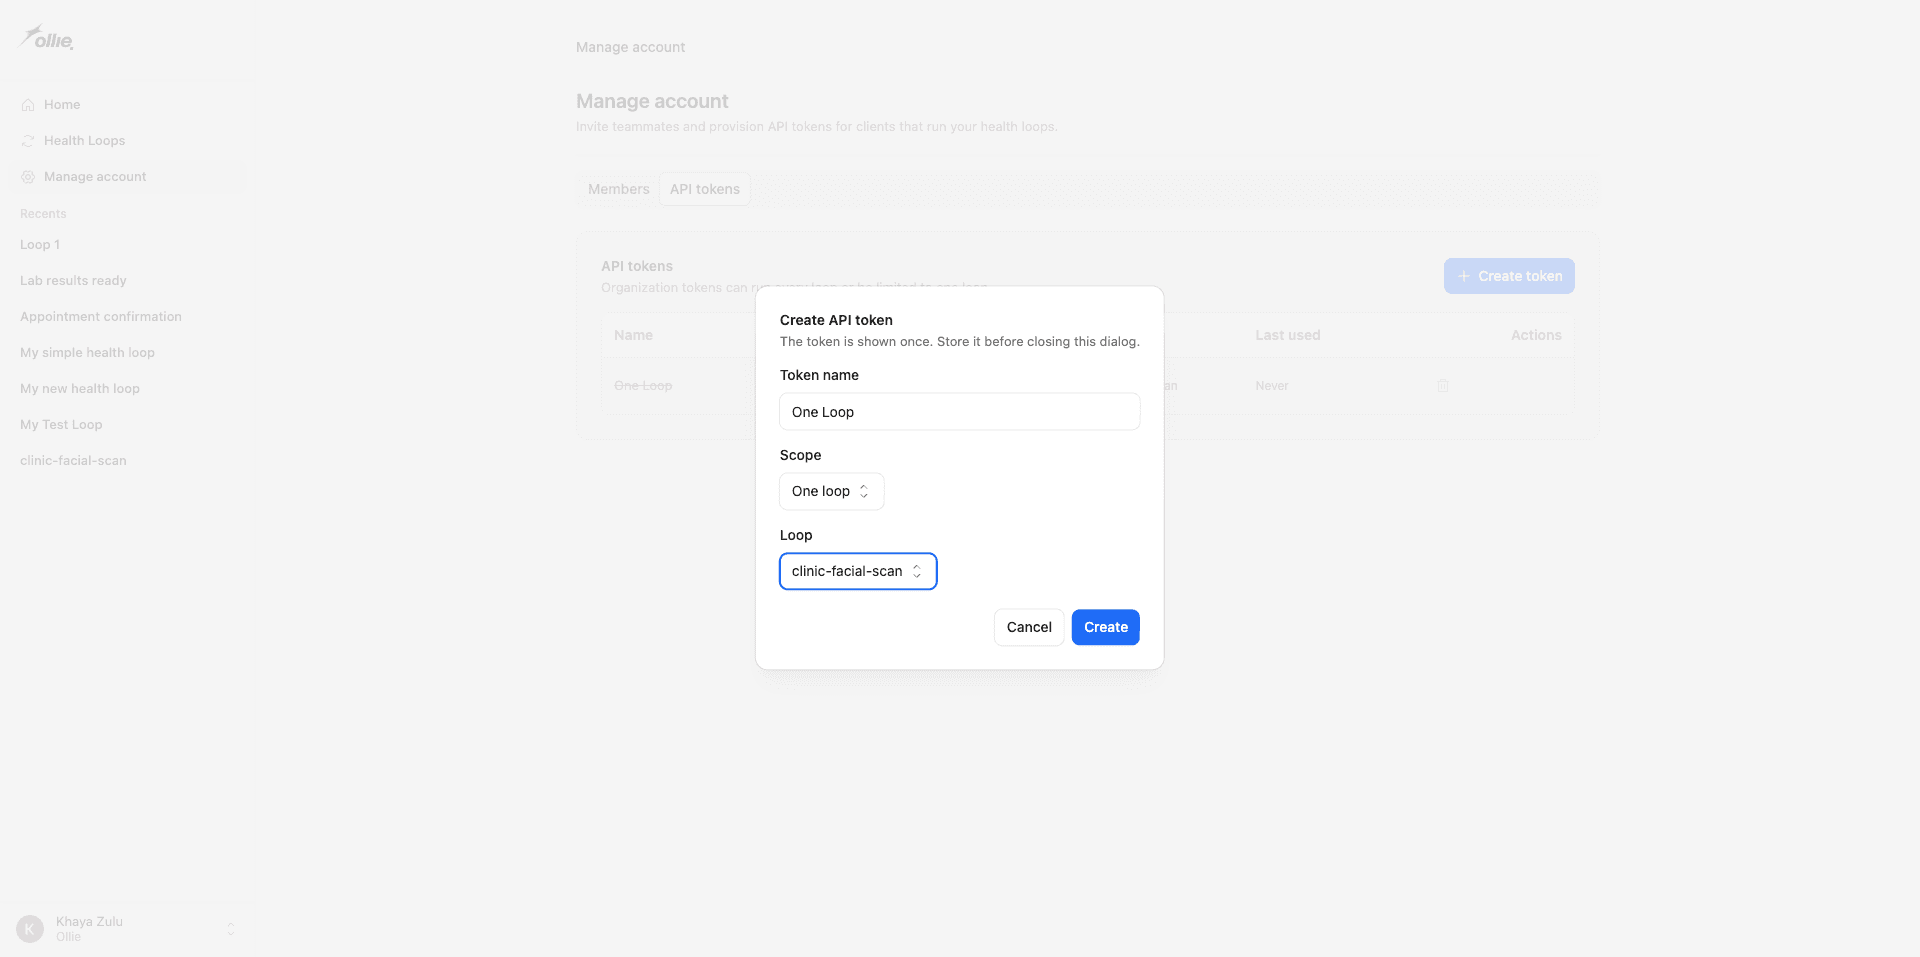
The microsite triggers the loop over the API, so it needs a token. From Settings → API tokens, click Create token:
- Name it for the integration — e.g.
Clinic microsite. - Scope it to One loop and pick
clinic-facial-scan. A token scoped to a single loop can’t reach the rest of the org if the microsite is ever compromised.
The full token string is shown once. Copy it into your microsite’s server environment as LOOPS_API_TOKEN before closing the dialog — there’s no recovery flow.
See API tokens for how scopes and revocation work.
3. Trigger the loop from your microsite backend
The microsite shows the patient the clinic’s own consent screen first. When the patient accepts, the microsite’s backend triggers the loop — provisioning the scan is the first thing that happens after consent, not before. Keep this server-side: the API token must never reach the browser.
// POST /api/start-scan — called once the patient accepts the clinic's consent screen
app.post("/api/start-scan", async (req, res) => {
  const { patientId, clinicSiteId } = req.body;

  const response = await fetch(
    `https://api.ollie.health/loop/${process.env.LOOPS_ORG_ID}/${process.env.LOOPS_LOOP_ID}`,
    {
      method: "POST",
      headers: {
        Authorization: `Bearer ${process.env.LOOPS_API_TOKEN}`,
        "Content-Type": "application/json",
      },
      body: JSON.stringify({ patientId, clinicSiteId }),
    },
  );

  const { runId, scanSessionId, scanUrl } = await response.json();

  // scanUrl is the hosted scan page — hand it to the browser to embed
  res.json({ runId, scanUrl });
});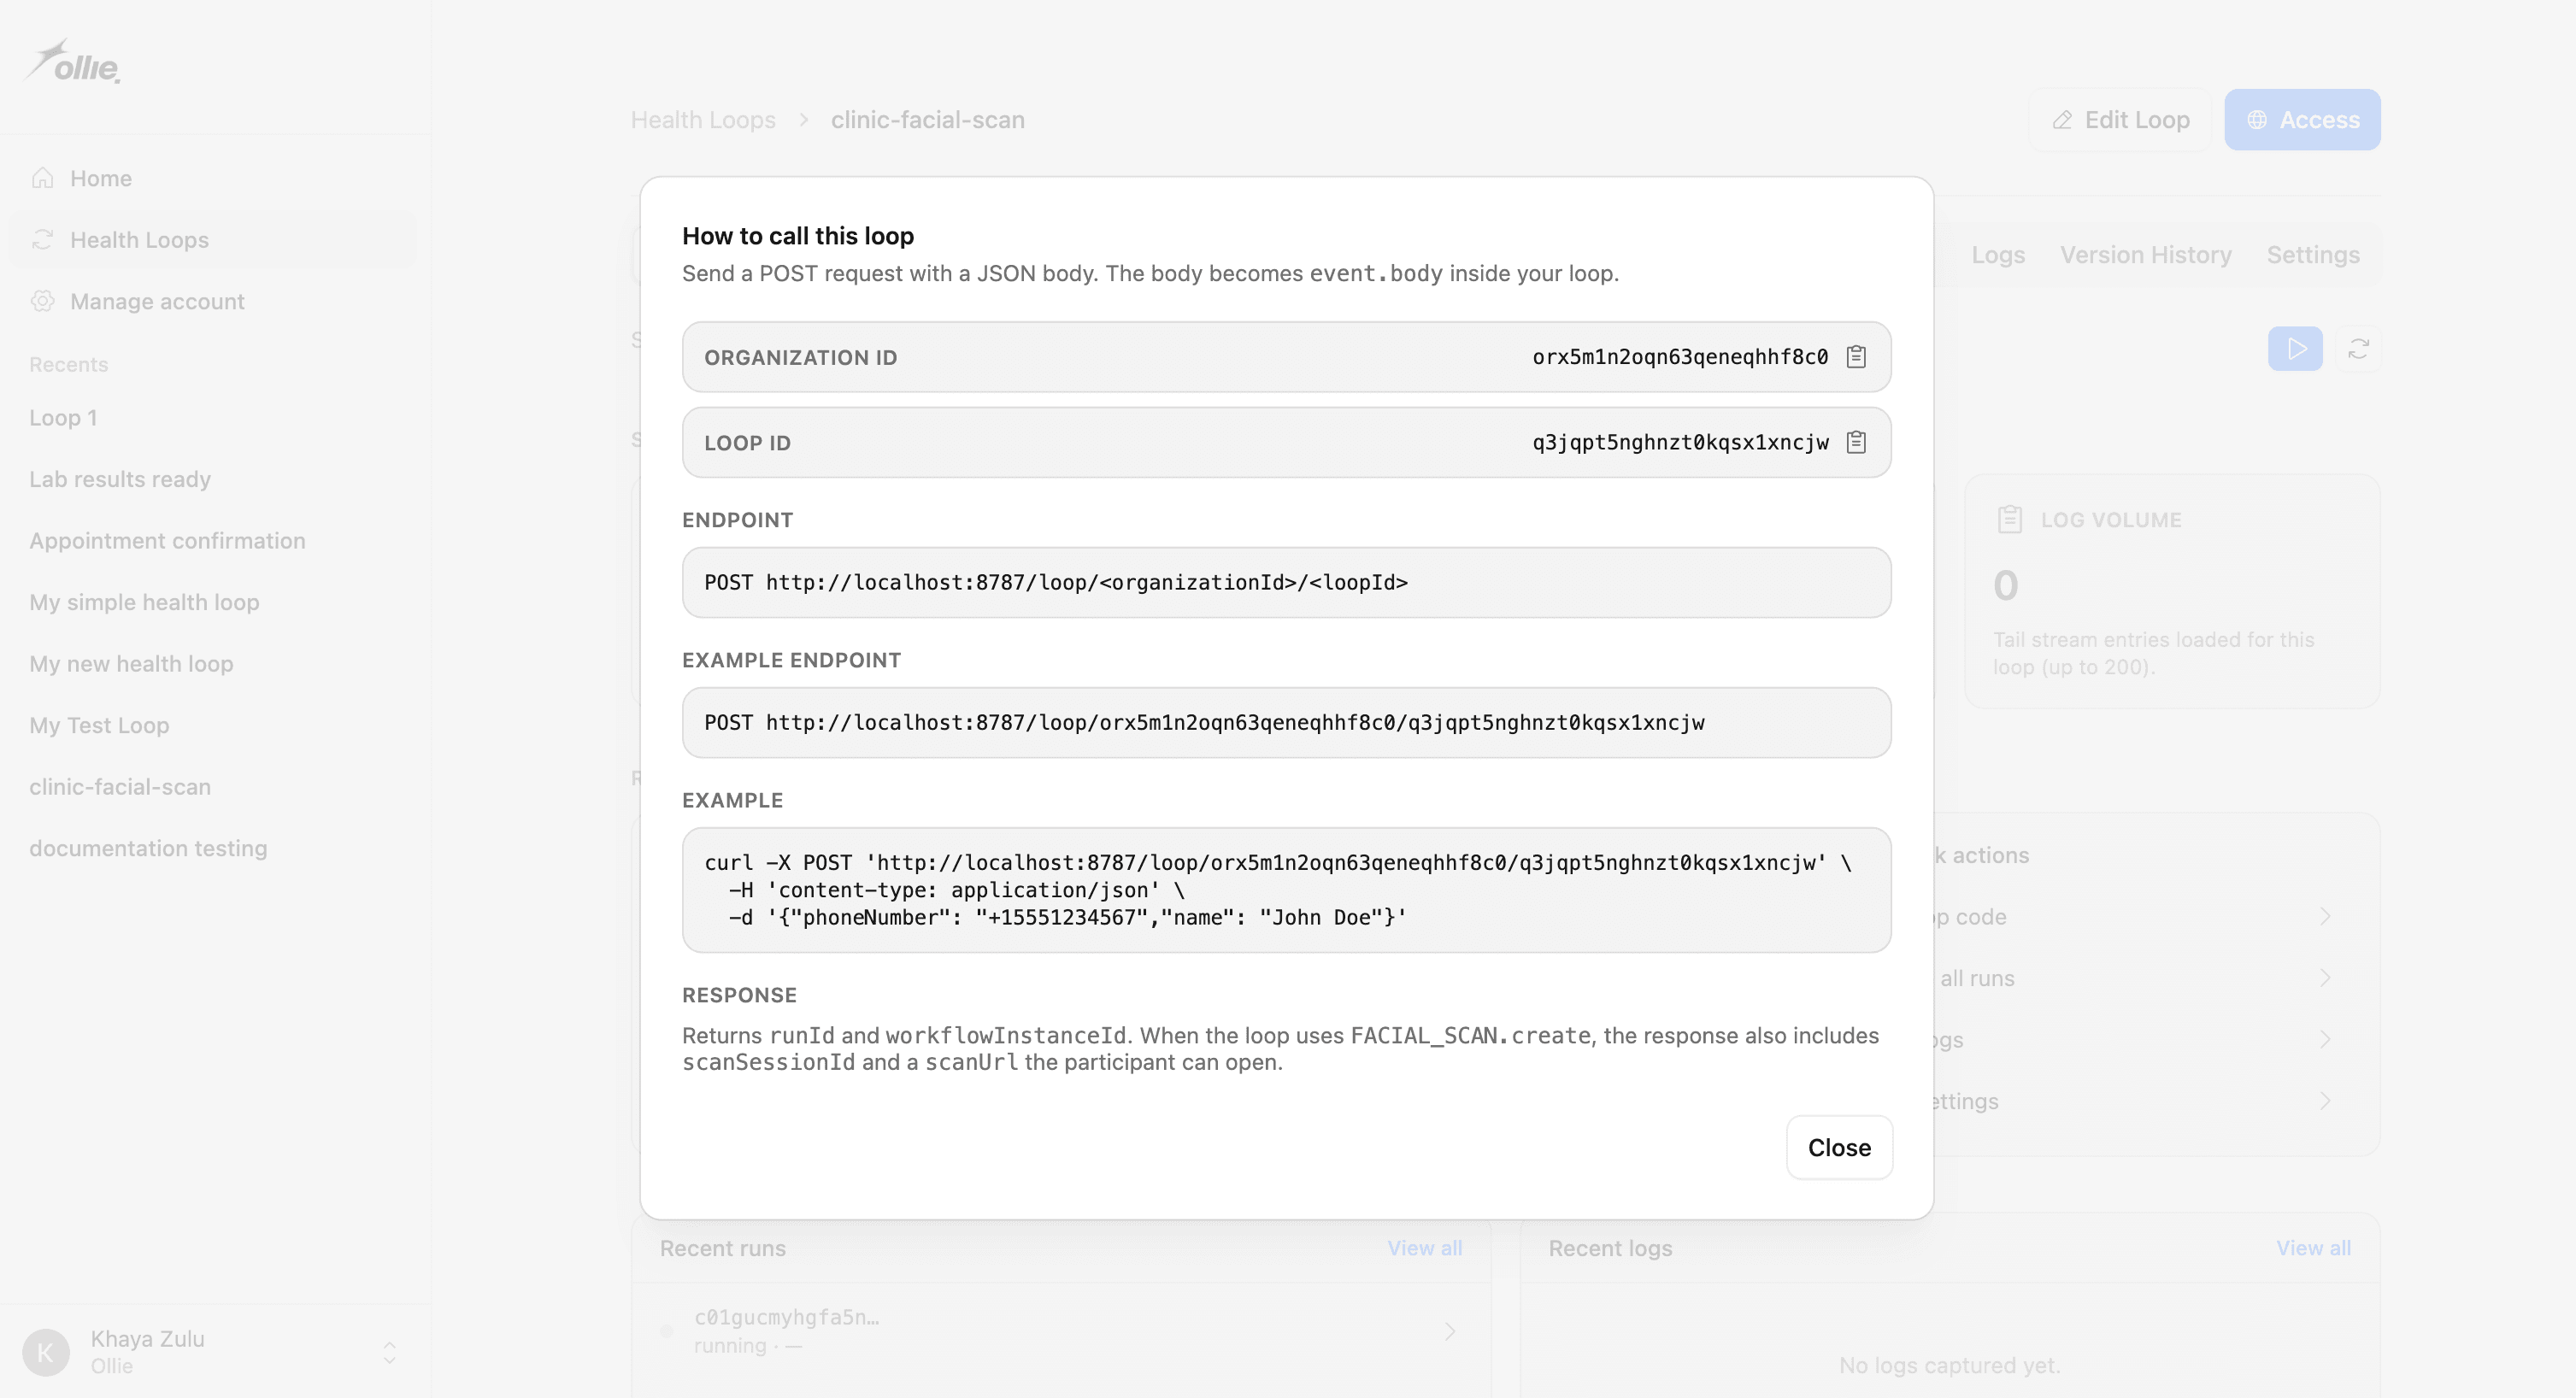
Get your Organization ID and Loop ID from the Access button in the top right of the loop’s overview page.
The JSON body of the POST becomes event.body on the run. The response carries back everything the microsite needs:
| Field | Use |
|---|---|
runId | Identifies the run — keep it if you want to look the run up later. |
scanSessionId | Identifies the scan session — this is the row that lands in the storage bucket. |
scanUrl | The hosted scan page. This is what you embed in the iframe. |
The session is real the moment the trigger returns — the platform provisions it before run() is even invoked — which is why scanUrl is usable immediately, with no polling. See Facial scan → Why the session is provisioned at trigger time for the mechanics.
4. Embed the scan flow in an iframe
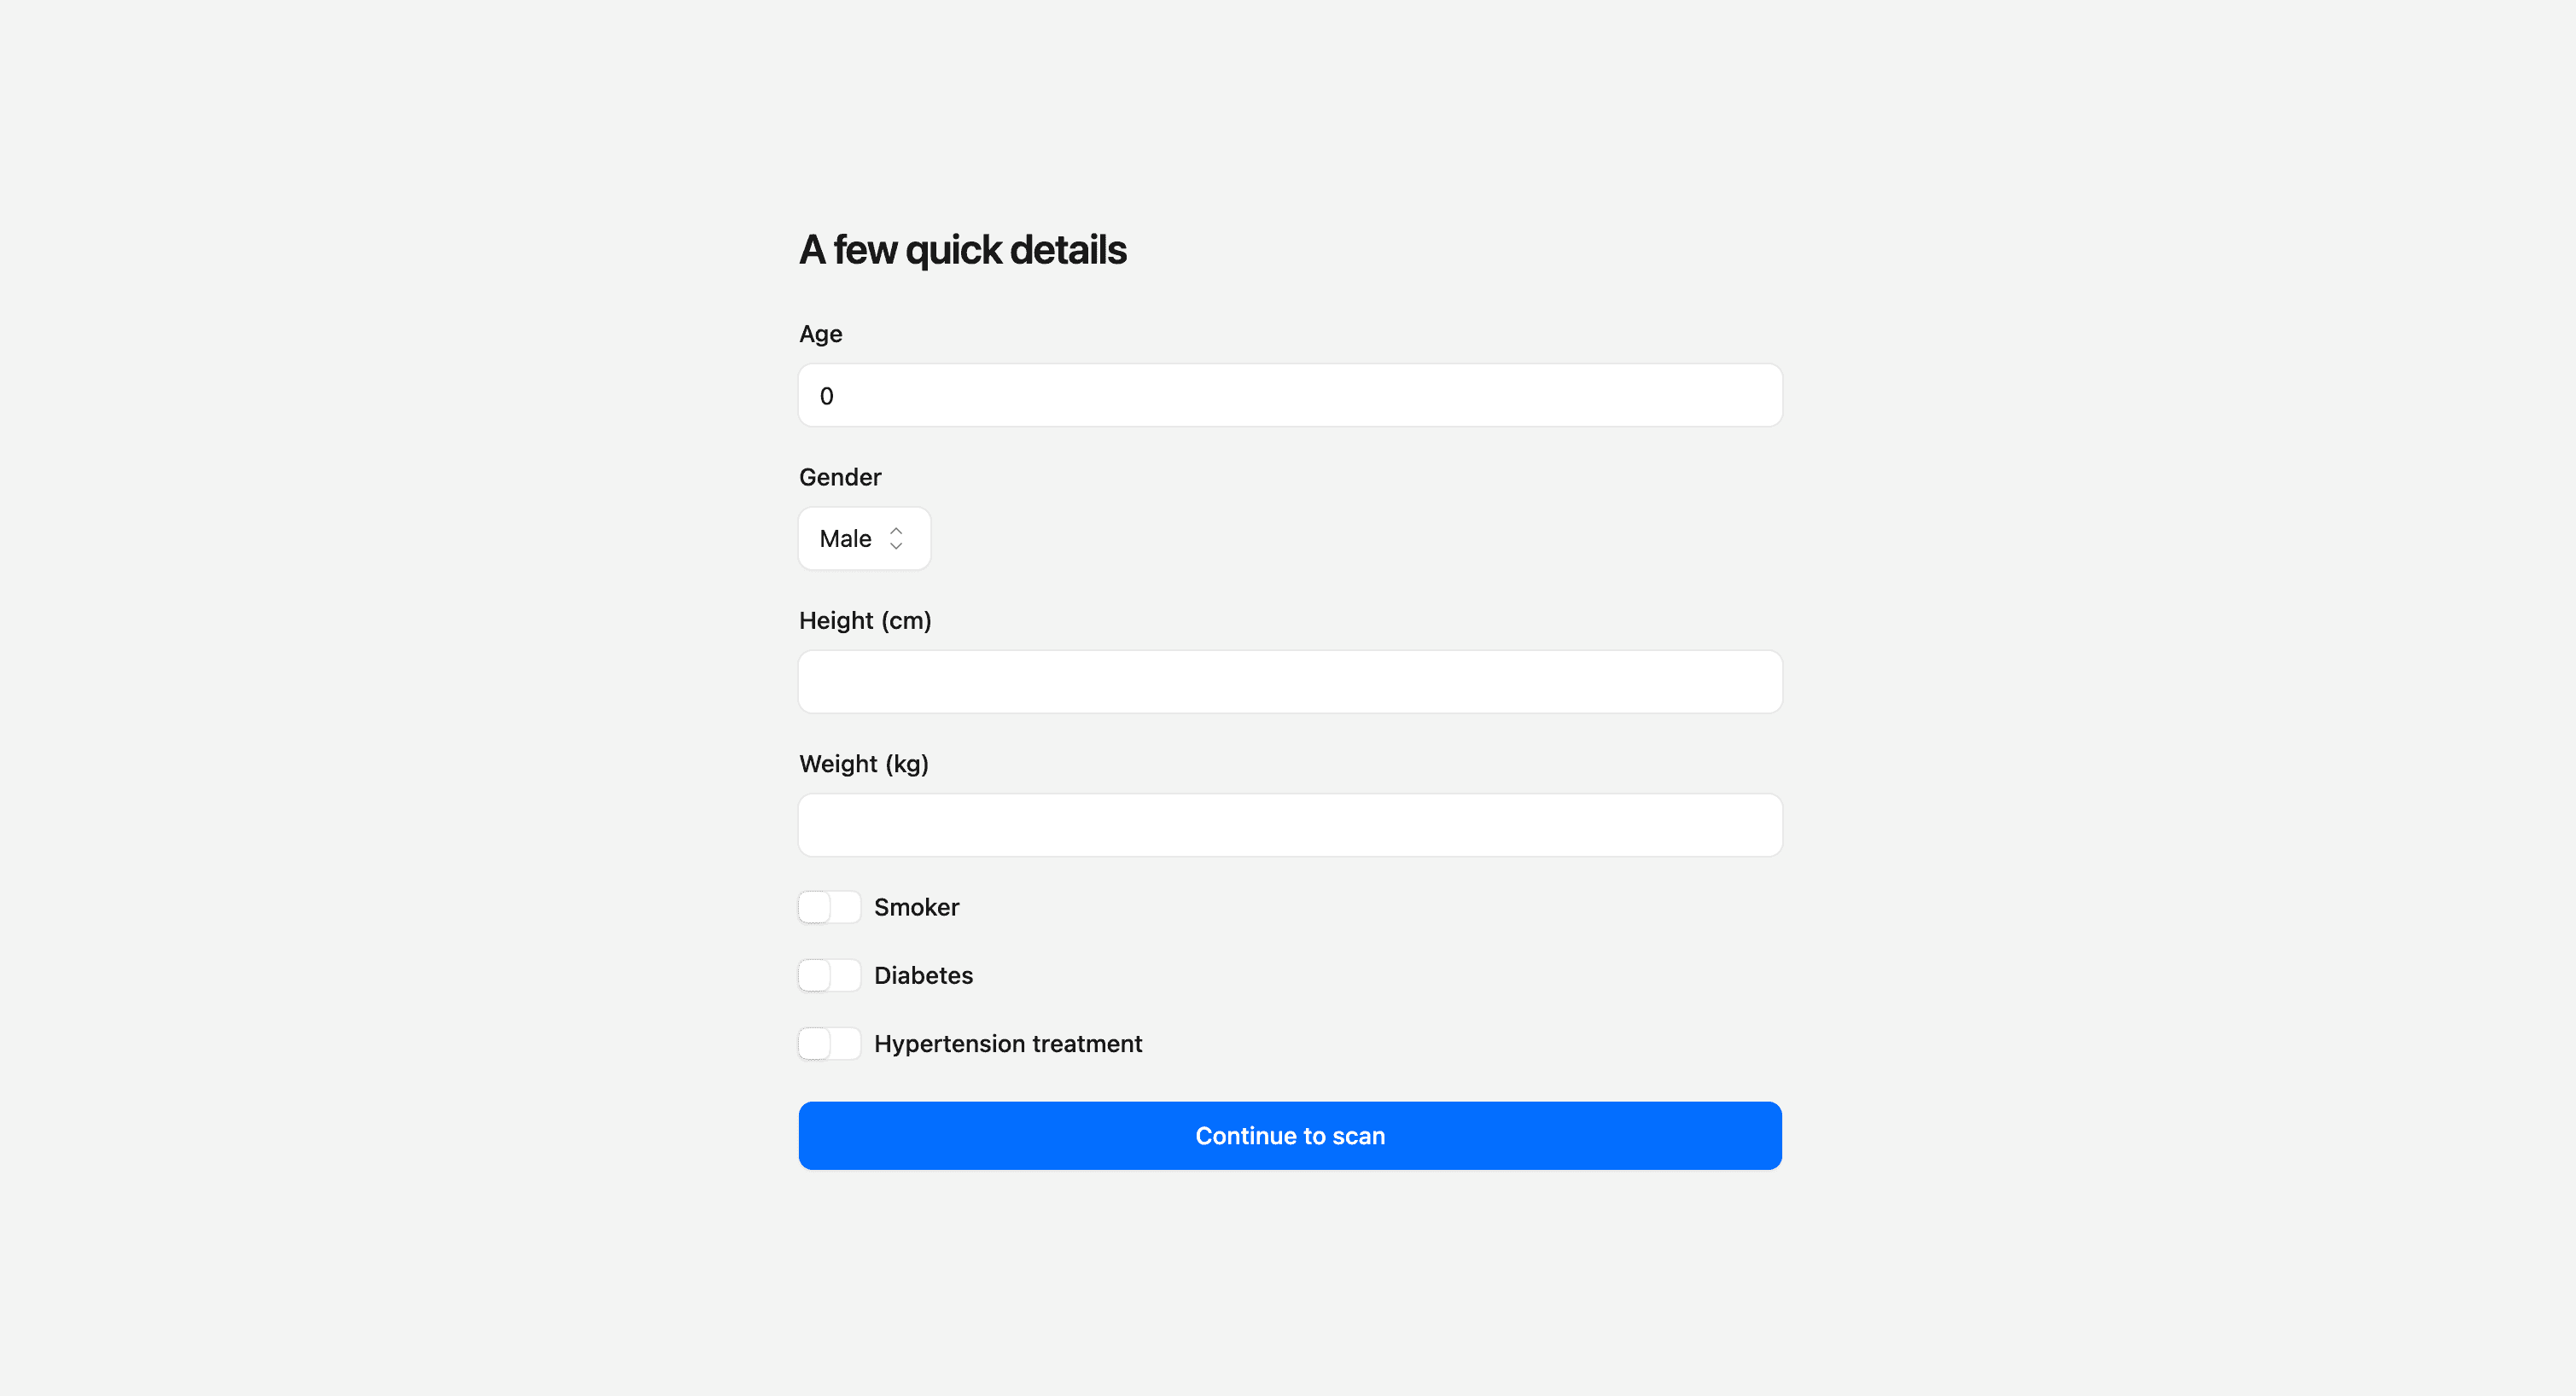
Once the patient has accepted the clinic’s consent screen, the microsite renders ScanScreen. It calls /api/start-scan, gets a scanUrl, and drops it into an <iframe>. The patient sees the intake form and then the scan, all without leaving the clinic’s microsite.
function ScanScreen({ patientId, clinicSiteId }) {
  const [scanUrl, setScanUrl] = useState(null);

  useEffect(() => {
    fetch("/api/start-scan", {
      method: "POST",
      headers: { "Content-Type": "application/json" },
      body: JSON.stringify({ patientId, clinicSiteId }),
    })
      .then((r) => r.json())
      .then((data) => setScanUrl(data.scanUrl));
  }, [patientId, clinicSiteId]);

  if (!scanUrl) return <p>Preparing scan…</p>;

  return (
    <iframe
      src={scanUrl}
      allow="camera; fullscreen; cross-origin-isolated"
      style={{ width: "100%", height: "100svh", border: 0 }}
    />
  );
}
Three things on the allow and sizing are non-negotiable:
allow="camera"— a cross-origin iframe doesn’t inherit camera permission from the parent page. Without this, the scan SDK can’t open the camera and the scan never starts.fullscreenis optional but handy on a clinic tablet.allow="cross-origin-isolated"— the iframe also needs thecross-origin-isolatedpermission delegated to it. Its default allowlist isself, so a cross-origin iframe doesn’t inherit it, and without the delegationSharedArrayBufferstays disabled inside the iframe even when both documents send the correct COOP/COEP headers.- Size it like a viewport. The scan UI fills its container — the camera preview covers the canvas. Don’t squeeze the iframe into a small panel; give it the whole screen.
The scan page sends Content-Security-Policy: frame-ancestors *, so it embeds from any domain — including your microsite. It also sets its own cross-origin isolation headers, but the scan SDK uses SharedArrayBuffer, which only works when your microsite sends COOP/COEP headers too and the iframe delegates cross-origin-isolated — otherwise the SDK throws SharedArrayBuffer is not supported… inside the iframe. See Facial scan → Embed the scan in your own app for the headers and a credentialless escape hatch.
5. React to scan completion
When the patient finishes, the iframe navigates to its own “all done” page. If your microsite needs to advance — show a thank-you screen, return to the check-in screen for the next patient — watch the iframe’s location for that navigation.
<iframe
  ref={iframeRef}
  src={scanUrl}
  allow="camera; fullscreen; cross-origin-isolated"
  onLoad={() => {
    // the iframe navigated — if it reached the "all done" page, move on
    // (same-origin checks won't work cross-origin; key off your own flow state
    //  or a postMessage from the scan page if you need precise signalling)
  }}
  style={{ width: "100%", height: "100svh", border: 0 }}
/>
You don’t need this to capture the scan — the loop’s waitForScan already resolved and the result is in the storage bucket regardless. Completion handling on the microsite is purely about moving the clinic’s own UI forward.

6. Use the facial scan storage bucket as your database
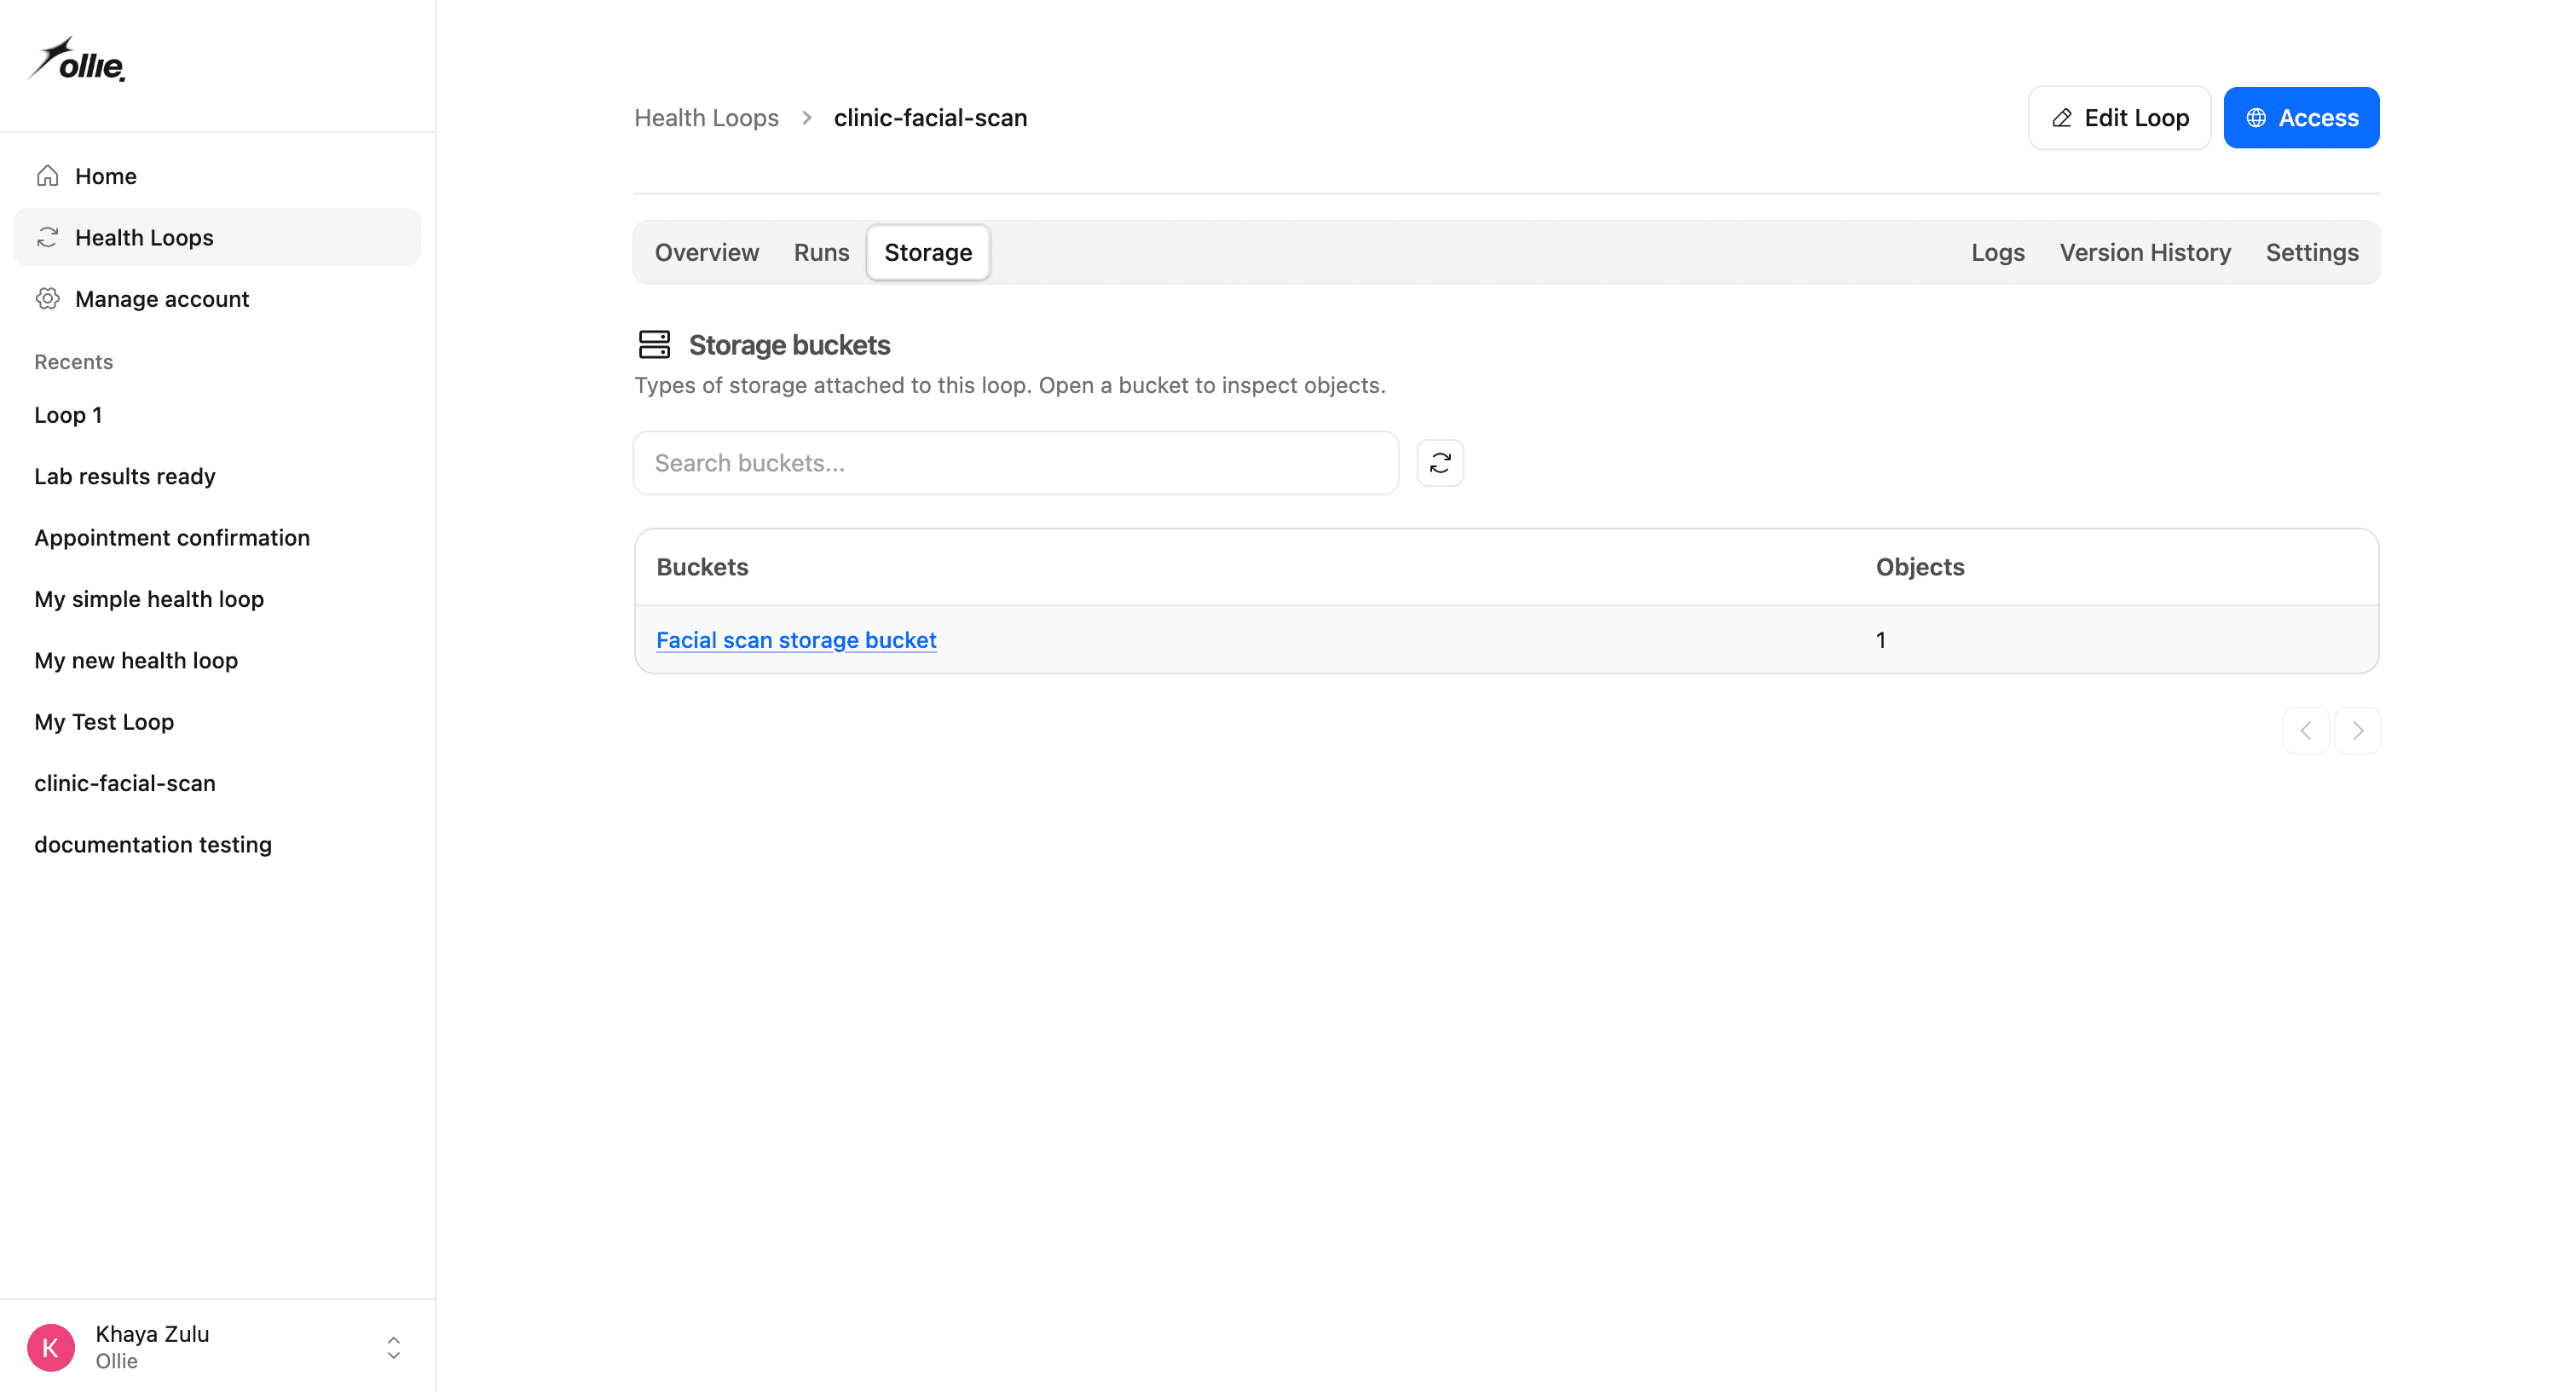
This is the part that replaces a database. Open the loop and go to the Storage tab → Facial scan storage bucket. Every run that provisioned a scan has added a row:
| Column | What’s in it |
|---|---|
| Scan ID | The scanSessionId from the trigger response. |
| Run | The run that provisioned it. |
| Status | pending / ready / incompatible / completed / timeout / failed. |
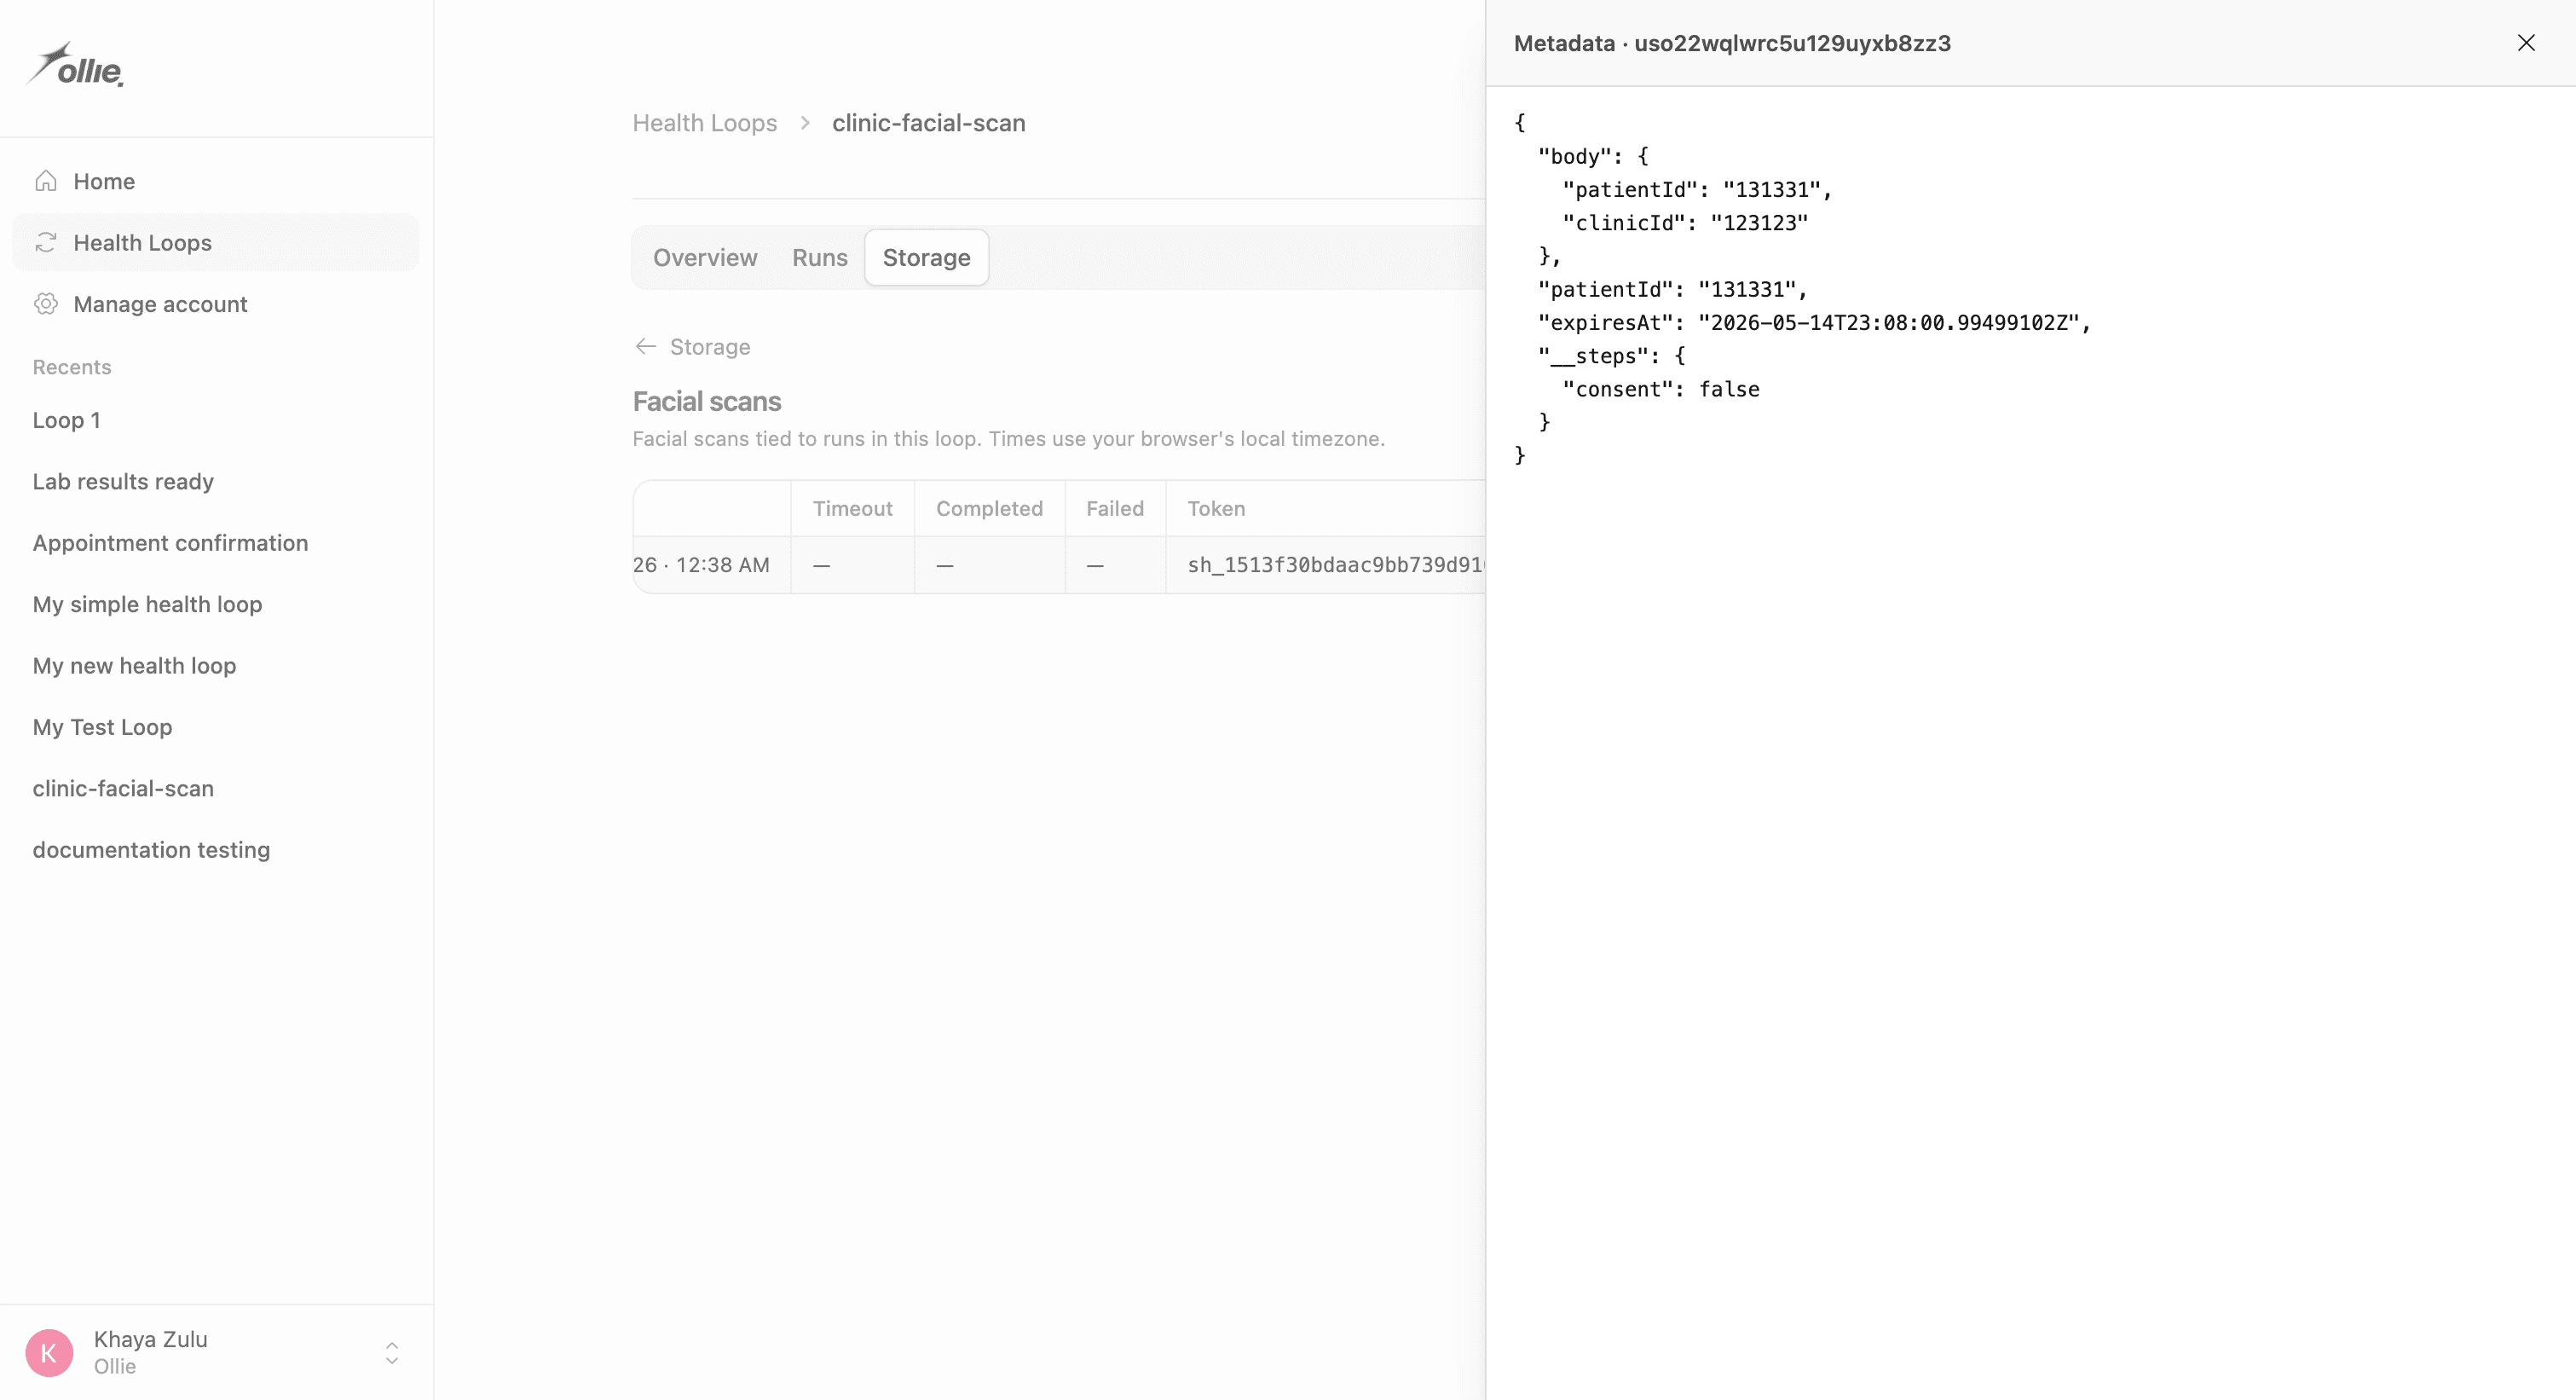
| Metadata | Exactly what you passed to FACIAL_SCAN.create — your patientId and clinicSiteId. |
| Intake | The demographics the patient entered on the intake form. |
| Results | The scan output, once status is completed. |
| Timestamps | Started, ready, completed, timeout, failed. |
Because every row carries metadata.patientId, the bucket is your patient scan history. To pull up everything for one patient, find their rows by patientId in the metadata column. There’s no separate database to provision, migrate, or back up — the scans live alongside the loop that produced them, and the clinic reads them straight from the dashboard.
For the full session model — every lifecycle state and what each transition means — see Facial scan → The scan session.
Recap
You built the whole flow without running any scan UI or any database:
- A
clinic-facial-scanloop that provisions a scan, skips the hosted consent step (the microsite collects consent itself), keeps the intake form, and tags each session withpatientId. - A one-loop API token the microsite uses to trigger it.
- A microsite backend that triggers the loop and a frontend that embeds the returned
scanUrlin an iframe. - The facial scan storage bucket as the patient scan database — every scan filed under the patient it belongs to, browsable from the loop’s Storage tab.
Where to go next
- Facial scan — the full tool API, step configuration, and embedding reference.
- Events and triggers — typing
event.bodyand the trigger paths. - Observability — runs, steps, and event logs for debugging a scan that didn’t complete.
Demo repo
A complete, runnable version of this microsite — the loop, the backend trigger endpoint, and the iframe frontend — is on GitHub: Ollie-Health/mobile-clinic-demo .